Confused about the output quality

I’m a bit confused about the quality. I watched a video about repper on YouTube that looked fun, so I felt compelled to try the app. But no matter what I create, the quality of the saved output is terrible. When attempting to print the pattern, it has to be scaled immensely to reach 300 DPI. After doing so, the pattern becomes so small that it’s no longer possible to discern it.

Since the file size limit for uploads is only 15 MB, it isn’t feasible to upload high-quality images. Logically, poor quality input should result in even worse output. So, what am I doing wrong? Any kind of tip would be appreciated.

Hi @Pixelmeplease, welcome to the forum! Wouter here, co-founder of Repper.

I understand your concern, and I can assure you it is possible to create high quality patterns with Repper. Indeed, once you know what to look out for, it gets pretty easy to achieve.

There are a bunch of things that come into play when it comes to resolution. I’ve discussed those in various places, but let me bring them together here, and you can see what info are the bits you’re looking for.

What happens from source image to pattern?

This article talks about how the resolution of your pattern is affected by the way it is generated. What comes into play here?

  • The resolution of your source image (bigger = higher resolution)
  • The size of the part of your source image you are repeating (bigger = high resolution)
  • The tiling you are using (more complex tilings give you larger tiles, everything else being equal)

The article shows these points in much more detail.

Most importantly, no matter how large your source image, if your selection is very small, there are only so many pixels Repper has to work with. We aren’t doing any upsampling, though there are good AI upsampling services out there these days, if you need them.

Source image resolution and file size

You mentioned the upload limited of 15MB per image. Because we use JPEG and PNG (more efficient formats than TIFF or BMP), this will give you quite some bandwidth to upload large images. I myself often use images of 15-25 megapixels or more, no problem. In cases where your source images a very large, considering saving your source images at a JPEG quality of 90% or so. The impact on image quality is imperceivable but the reduction in file size is enormous. In terms of resolution, Repper can handle source images up to 12,000 x 12,000 pixels.

Exporting

We’ve made an in-depth video about exporting patterns, which also has some pointers about how to optimize for resolution. Important here is to consider the DPI needs for your particular application (for example, textile will require lower resolution than paper, a poster less than a business card). Here’s a blogpost series I wrote about DPI, in case you’re interested.

What that looks like in practice

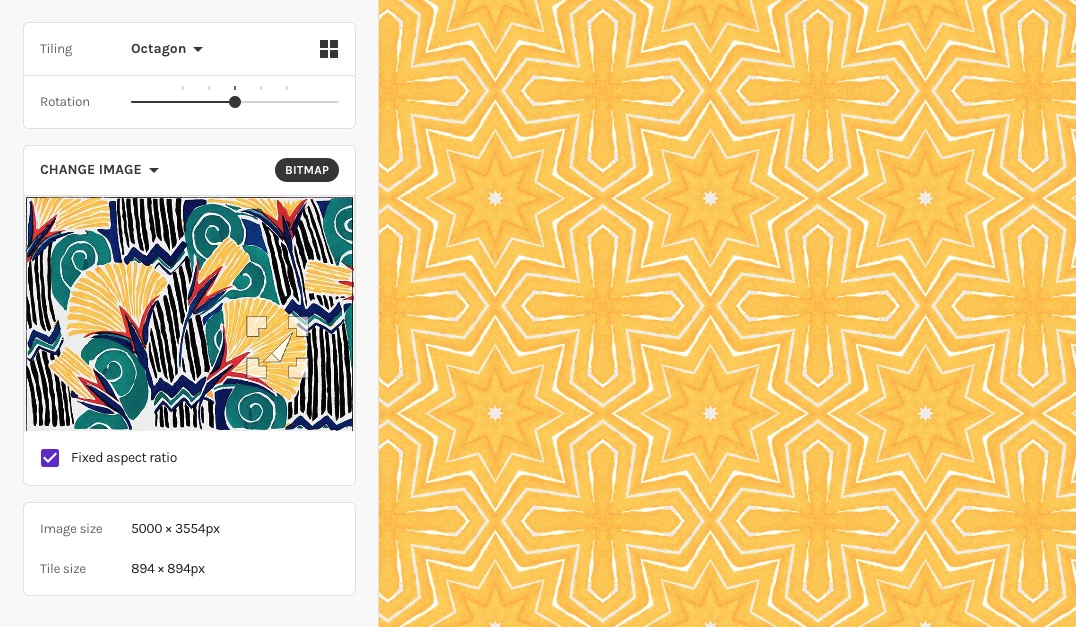
Let’s take the source image of our demo project, which is around 5,000x3,500 pixels. Let’s take a simple tiling (Octagon) and I select a very small part of the image. Below you can see, the resulting tile size is around 900 pixels (bottom left):

What does this mean for my resulting pattern? As I mentioned, I’ve made a whole series about how DPI works in general and specifically in Repper (you can find it here), but in short:

900 pixels / 300 DPI = 3 inches

Do you plan to use your pattern with a tile size no larger than 3 inches (7.5cm)? Perfect, you’re good to go! So for example, a print on a notebook with a few repeats would probably work great.

What if you’re printing on a bedspread? In this case, 150DPI would typically suffice, so now a single tile could already be 6 inches (or 15cm).

What if that’s not enough?

There are various things you can do:

  • Make larger selections: 2x selection = 2x maximum tile size (Source images with less detail or elements lend themselves often better to selecting larger areas)
  • If you have it, upload a larger version of the source image
  • Use a more complex tile that creates a larger tile size

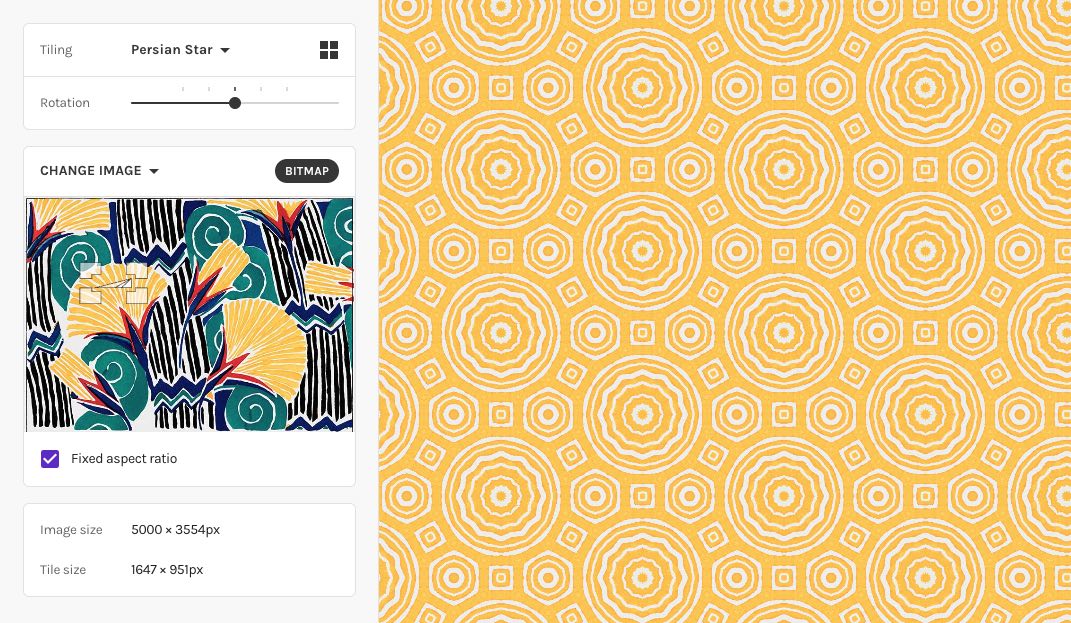
Below you can see a similar selection size leading to a much larger tile size of approximately 1,600 x 1,000 pixels when choosing a different tiling (here, Persian Star).

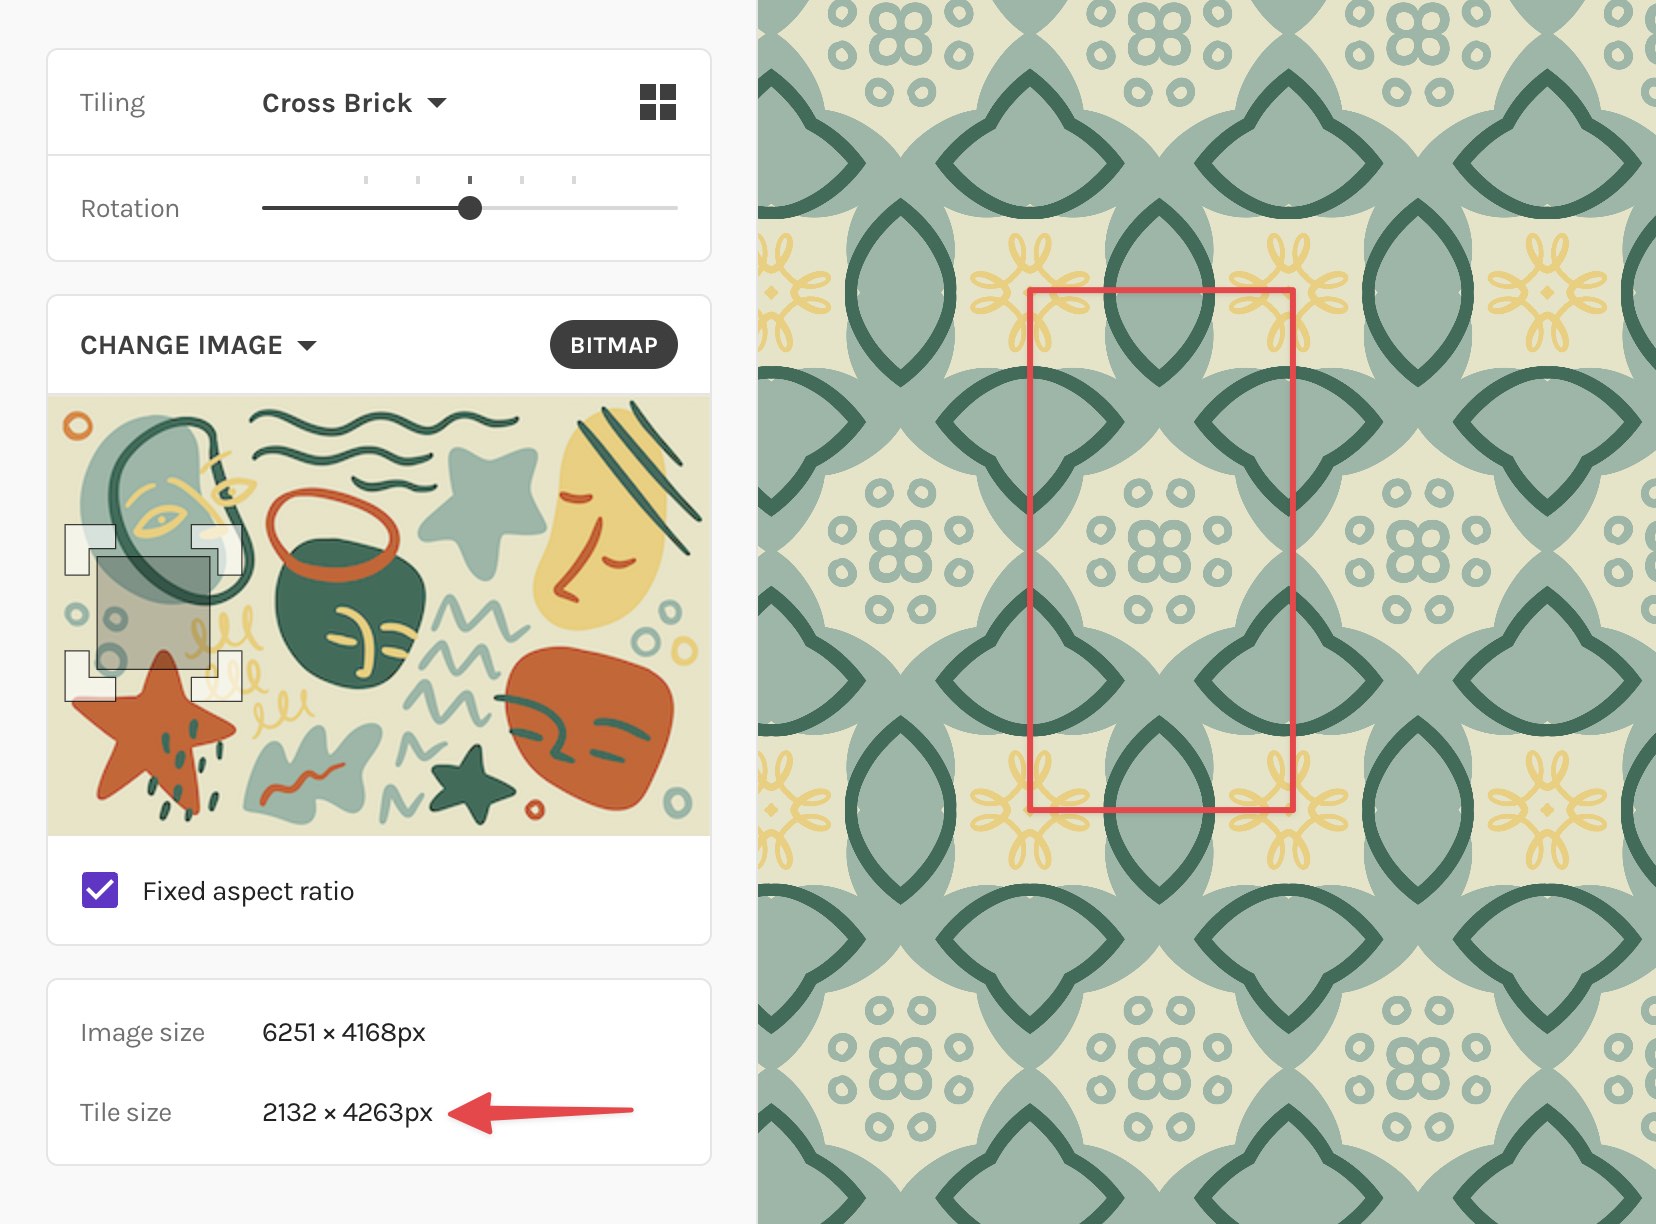
Below you see a larger source image (±6K x 4K = 24 megapixels) with a reasonably large selection and a medium-complexity tiling. The resulting tiling is over 2K x 4K, meaning the maximum printable height of a single tile (in red) at 300 DPI is over 13 inches or 30 cm. For fabric prints, you could go up to 60 cm.

In conclusion

I hope this helps! If you are having specific situations that you are struggling with that I have not mentioned here, please reply and I’ll try to address them specifically.

I’m sorry you’re having that issue and wish I could help, because I never had that problem. I have even had fabric printed. If you have not, maybe check and/or change export size.

@Pixelmeplease - In my own experience… The better the resolution is in your source image (the one you are going to make your patterns from), the better the resolution is on the repper patterns.

Often IF my source file is not clean (may have dirt in them if they were made using ai), or not good resolution, I will take it into Illustrator and use Illustrator’s Image Trace on it. There are probably other programs that will do what Image Trace does, but I am not familiar with them. Illustrator’s Image Trace will make the lines vector so they can be resized to just about any size and still be smooth and clean and often if there are tiny dots or discoloration on the image it will remove it.

I upload 300 resolution files to Repper.

Hope this is helpful in some way.

Roz Fruchtman

P.S. I find IF the source file is good, I don’t have to worry about the resolution on Repper Pattern files I create.

3 Likes

Thank you! Vectorizing them did the trick. Huge difference on the output.

1 Like

@Pixelmeplease - Glad to help!

IF you vectorize first it saves tons of work and aggravation later.

May I ask what program you used to vectorize? I only know about Illustrator, at this time.

Enjoy the rest of your weekend! ~Roz Fruchtman

I’m lazy so i use vectorizer.ai

Simply drag and drop. Takes a few seconds.

1 Like

Thank You for sharing. I am not sure I would call you lazy! :wink:

I see that vectorizer.ai is free for the moment, but could get expensive to have to pay by the month for it. They are chargng what it would cost for Photoshop’s Photographer’s Plan. :wink: AND I DO pay monthly for Photoshop’s Photographer’s Plan. I cannot justify the full cloud, and basically only use Photoshop. I’ve not learned Lightroom yet, but it’s included in the $9.99 monthly fee!

The price is for API use only. The standard web based version will always be free.

1 Like

@Pixelmeplease … But isn’t it a monthly fee? You get 50 credits a month (for the lower plan) for $9.99. Each credit is for 1 image.

As long as it works for you, it does not matter. I already own Illustrator CS6, so I use that. I did buy the Affinity Suite last year at this time, but I did not even install it yet. Photoshop is my Go To graphics program. I have no idea how Affinity deals with Vectors, or if they have a substitute for Illustrator’s Image Trace! :wink:

I am truly glad you found a way to get the patterns to work for you. Repper is truly the best! :wink:

Roz

No, the monthly fee applies only to API usage. If you integrate vectorizer into your own software or website, you will have to pay. The web-based version is free and will remain free.

The only downside to the free version is that it doesn’t support bulk image conversion. You can only convert images one at a time. Guess you can convert 100s in one step with API.

1 Like

@Pixelmeplease - I haven’t ever done batch conversion for vectorizing an image. Each image/pattern is different and it never occurred to me (at least yet), to do them in batch.

IF you vectorize the BASE image BEFORE uploading it to Repper to create patterns from it, you should RARELY (IF EVER), have to vectorize the NEW patterns created from that image. after they are created. At least this has been my experience… to date!

Roz Fruchtman

i miss when you could actually OWN adobe products. i had a stable copy of CS7 that worked fine for what i was doing for years, and then, boom, laptop died, software wouldnt transfer, and $ monthly fees forever. gotta love em. I have never tried any of the open source photoshop emulators, anyone have any good experience with those?

Tried Gimp but it was to bloated for my taste. I currently use Affinity Photo and Affinity Designer. They are more or less clones of Photoshop and Illustrator. No AI built in though. It’s a one time purchase for around $20 each.

1 Like

In the end I don’t mind paying for Photoshop. IF you figure out how much it costed to upgraded each time they came out with a new version it’s probably about the same or cheaper. I just have the Photographer’s Plan for $9.99 a month. And they do help via phone if you have a problem - for no charged. I guess the charge is included in the monthly fee :wink:
[Of course I would rather not pay monthly, but Photoshop is VERY important to me and sometimes i use it daily. AND THEY DO update it often! I have multiple version on my computers.

I bought Affinity Suite last year around this time. I bought the NEW Suite which works on everything… Windows/Mac/Ipad and multiple devices. It was VERY affordable at the time… I think $99 for the whole kit-and-kaboodle. It’s much more now. I’ve not used it yet, but everything is included in the Suite and it was a One-Time purchase!

i find that it over- posterizes the image , and lots of detail is lost. ive messed woth the settings but havent been able to get the output to look sharp with the amount of details i want. seems like it ends up a sort of paint-by-numbers filter. maybe i just like jpg artifacts :wink:

1 Like