How To Make Coloring Book Pages With Repper

So, I subscribe to Repper with the express intention of creating patterns that would work as coloring book pages. I still haven’t managed it.

I hope this thread serves as a guide to making usable coloring book pages in Repper.

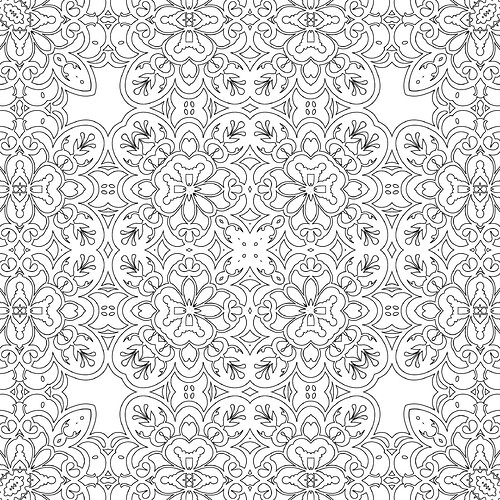
I have been making beautiful patterns like this in Repper:

Now, this image is potentially even more beautiful than a typical mandala.

I have read “Which to use: bitmap or vector” on the Repper site and I thank Repper people for it, but I feel that it needs criticism. This page is mostly about “using” Repper and the differences between vector and bitmap. Tell me useful things. What designers need is how do you get this design and that design. Use cases. Mural of this size? - like this - for framing? - like this - for T-shirts? - like this. This page reads like "…well… depends… " and vector does this and bitmap does that.

My usecase is Repper images for coloring pages.

I need to create scaleable patterns without jagged edges for a coloring book?

  1. What is the recommended file-type for the source image, vector or bitmap? You’re not allowed to answer with ‘depends’ :rofl:

  2. What are the recommended dimensions of the source image?

Please chip in anybody, not just Repper people.
Thanks.
Hey! Your art looks great! I’d recommend using vector as your source if you want it to be scalable without affecting the quality. This will give you the most flexibility in sizing your final image.

However, if you already started with a bitmap image, you won’t be able to obtain a finished product of a vector. No problem! You can still make printed coloring pages look sharp with bitmap. Using 8.5" x 11" and a high-quality print dpi of 300 as a reference, your final image would be 2550 x 3300 pixels. If you plan on a different size, multiply the inches by 300 to figure out what finished size you’ll need.

Unfortunately, this is where the “it depends” pops in. Depending on how you create your image and how many repeats you’re creating, your source image size will vary. Designing a coloring page of a single tile may require a source close to the finished pixel dimensions. Designing one using 5 repeats would only require one-fifth of that. Overall, I’d say you should have decent success using bitmap sources in the 500-1000 pixels wide/high range.

Hopefully that helps! :v:

Oh my gosh! I want to color your page!! I use my original ink drawings for Repper patterns for my POD products.

I have no advise on how to do printables but know of some YouTube videos that explain the process.

Thanks for your thoughtful answer, @jcqzu!
@btreick, any YouTube videos that you know of that explain it especially well?

As @jcqzu pointed out, if you can find or create source images with a decently high resolution (and especially if you are used to working with bitmap), give it go like that. Because the size of a typical colouring book doesn’t vary that much, you can find out quite quickly if your source images will do the job. A 300 DPI print of a 300 DPI bitmap or a scale-free vector makes no difference! Working with bitmap is simpler than vector, so it’s a smart option to go with, as long as you don’t find yourself running into limitations.

Another very good reason to use bitmap over vector, is that vector only supports a subset of our tilings (and no effects), so bitmap gives you more creative possibilities.

One reason to choose vector, is that it allows you to adjust the stroke thickness afterwards, either to make them fit the pattern or to make them consistent across your colouring patterns. For the same size surface, the stroke thickness will be affected by the sample area and the repeat count (as your source image lines will appear larger or smaller on the pattern surface). With vector, you have the option to start with a thin stroke on your source image. When you export it, Repper will need to turn the stroke into a filled shape to create the pattern, but you can still add a stroke to that again afterwards to visually increase the stroke weight (note: you can’t reduce it!). You can do this in vector graphics software like Illustrator or Inkscape.

Here you can see a vector pattern I’m making in Repper with a very thin stroke:

After exporting it, in Illustrator I add a stroke to the lines (which are now filled shapes, no longer strokes, as explained before) and vary the thickness as I wish. Note that you’ll need to use rounded stroke corners and ends to avoid weird artefacts in your lines.

As you can see, there’s quite some things to consider, and this is just for colouring books. That’s why we didn’t go over all the details in our Vector vs. Bitmap article in the Help Centre, instead giving some considerations to help you figure out what suits your needs best.

I hope this helps a bit. Feel free to ask further questions, or for others to pitch in with more ideas or tips! :slight_smile:

Using Bitmap images is perfectly fine. When you go to export, just set your size required, image type (.png) & dpi to 300. This then makes the images ok for coloring books.
You can create a mandala on any of the free mandala makers online & then bring that into Repper to create variations of it. Alternatively, find any line art image & use that to make a mandala pattern. Another option if you want to use vector, try any of the free vector image sites & then use any image to make a pattern. Sometimes these make the best patterns. To make sure you don’t have any jagged edges, place your created pattern inside of either a rectangle, square or circle that has a black border.
These are some of my patterns, some from colored images & a couple from vector


:slight_smile: :person_raising_hand:

Just made a set of cushions using the tile border feature. Love it :slight_smile: :heart_eyes_cat:


1 Like

Mey Aroyo printable YouTube videos. Here is a link to her videos.
https://www.youtube.com/results?search_query=mey+aroyo+printables

Wow guys, I’m so happy for your involvement in my topic of coloring pages.

Peaches1001, my biggest concern is the “jaggies” as I call them, those dreaded jagged edges on lines that you get from bitmaps. I have a lot of experience with the common bitmap files .png, jpg and no experience at all with vector. It’s a wall that I’ve hit. As I have got to the stage where I have succeeded in creating coloring page images that I think are now good enough, not just patterns but animals, people and more, I am now ready for the packaging and deploying stage. I recently got into the habit of zooming in to look at mandala coloring pages created in Midjourney and it’s clear to see that MJ cannot (yet) cope with the fine, small details. That zooming in habit grew into needing now to zoom into everything, maybe you see the line image as the person coloring in sees it, and as the saying goes, the devil is defintely in the details.

Repper not only creates amazing patterns but it’s a lot of fun moving that triangle around and getting so many usable images. The Repper effects reminds me of kaleidoscopic images. Is Repper kaleidoscopic? Does the name Repper come from the word ‘Repeat’? It would make sense then for it to be a pattern repeater so kaleidoscopic. Is Paint.net kaleidoscopic and using the same tech? I find the latter very clunky and dated to use in comparirson to Repper.

So I created a lot of paterns in Repper, to create coloring books with. A lot. Then my heart sank when I saw the “jaggies”! So, I had a new mission, I have some great images but they will not pass the zoom test. Convert them to vector! Yes. Oh wait, but if vector is the way to go why doesn’t Repper and the other image creators export SVG? Confused now. Out of all the YouTube video tutorials I’ve wateched just get to grips with the process not one of them mentions vector or SVG. More confused. But the .pngs fail the zoom test, how can they be OK for KDP? Everybody does recommend a DPI of 300 but another video says that DPI is irrelevant. This seems to be confirmed when you look at the new AI upscalers that never mention DPI only px size. As I thought, DPI is dots per inch and only relevant to printing. And then I realise that I have been fussing for nothing because Amazon KDP wants you to upload your books as PDF, and the images DO pass the zoom test in PDF, I’m assuming because PDF converts the pngs to vector (?).

peaches101 what do you mean by “…To make sure you don’t have any jagged edges, place your created pattern inside of either a rectangle, square or circle that has a black border”?

Do you mean place a Repper-created pattern inside a shape with a black border or place a pattern inside a shape with ablack border before placing it into Repper? And why does this help avoid the jaggies?

hello again,
If you upload a svg image to work on, when you download your pattern it will also be svg
When I said place inside a rectangle/square/circle, I meant the following. If you have any of the graphic programs you can insert an image inside another, so that the overlap never shows. If yo have Affinity Designer or even KITTL online, it allows you to do this. Yes to your first option you said.
kaleidoscope is not the same as Repper. I had Kaleidoscope before they finished & I still use it, as it allows for adding patterns inside of shapes but you could make your own in the free Canva option. Create a rectangle with bleed the size of your page for your coloring book, & cut out the middle section in what ever shape you want, then add your pattern behind that shape. Kittl makes this much easier as it uses masks.
Another option is to create vector from your pattern using vectorizer.ai which will create a vector from any opject. Or alternatively you can buy a vectorizer software. I use Photozoom as well as vectorizer, it a case of just trying & seeing which is better.
Yes, all uploads to KDP are PDF, so anything at 300 dpi will be fine.
I’ve attached a svg link for the image I created in Repper & downloaded as such.
Although the image in Google Drive looks awful, when downloaded & added to a vector program, it is still vector. This is the link to the image: https://drive.google.com/file/d/1-8j7euftfQY373QUhoV_KCa9fQF6BrTx/view?usp=drive_link
:slight_smile: :person_raising_hand:t2:

@Bernardus I agree, bitmap/vector and DPI details can get real confusing at times! If you are not familiar with vector yet, I would definitely recommend sticking with bitmap for now. Indeed, zooming in and out is a good habit to check for quality.

Another thing you can do keep is an eye on the tile size in the pattern tab while designing. It will show you the largest a single tile can be without upscaling.

Not sure what the single tile looks like? Click “Tile” in the top bar to view (and click “Surface” again to switch back):

Now let’s assume you are working on a pattern and you imagine you’ll have it repeat (as a tile) about 3 times horizontally on the surface. Let’s say your colouring book will have patterns at 6" × 10", so at 300 DPI you will need 6×300 = 1800 pixels in width. If you tile size is more than 600 pixels and as said you plan to repeat it 3 times, you are in the clear!

This approach works great if you want to work in full pattern preview. In the next post, I’ll explain how to do it if you know exactly at what size you want to export.

I you already know exactly at what size you want to export your pattern surface, there’s a pretty simple way to avoid disappointment by insufficient resolution.

Here’s how to do it:

  1. Go to Export tab
  2. Select “Custom” size
  3. Set the size you want to export at in the end
  4. Set the units to your preferred setting (in US, usually inches)
  5. Set the DPI to 300 (or higher, depending on your printing needs)

Now if you see a warning at the bottom of the export screen (6), it means you don’t have sufficient resolution in your source image to create this pattern without upscaling. A little bit of upscaling may be okay (say 10-20%), but too much gives you jagged lines (of course, we’re assuming your source image is nice and smooth!).

Because you don’t want to change your size, you’re only option here is to increase the repeat. If you click the “Increase repeat” button (6), Repper sets the repeat count to the lowest possible repeat that doesn’t require upscaling. Of course, you can also opt to increase you sample selection in the Pattern tab and get more resolution into the pattern that way.

You can keep these settings like this while designing. Whenever you have something you like, simply switch to the Export tab to check if it meets the resolution requirements.

1 Like

Lastly, about DPI.
This is a pretty big topic and because we often received questions about it, we’ve made a whole series of blog articles (link to all articles) going into the details:

  1. The principles and difference between analog (print) and digital (screen) DPI (link)
  2. The myths and misunderstandings (link)
  3. How to calculate with DPI in Repper (link)

The most important thing to remember, is that for digital images, DPI is simply a metadata fields that tells the printer or other graphics software at which size the image would be preferred to be shown. Setting DPI high or low on a 100x100 pixel image does nothing to the quality of the image.

The only case where DPI does affect resolution in Repper, is when you set “Unit” in the Export tab to a physical unit like inches. In that case, Repper uses your physical size plus DPI to calculate the necessary resolution (see my previous reply in this thread).

Hope this helps! :blush:

1 Like

WOWters, lots of great advice and tips and I am encouraged and inspired to get into Repper and make some coloring books!

You really should send out a weekly tips email newsletter. Don’t just send people to videos, they won’t bother, if it’s in the email they just have to scroll down, right?

1 Like

It’s a good idea to make tip emails beyond the ones we send in the first 2 weeks after signup!

I tend to be a bit perfectionist, so I want a neat blog article or compact video. That’s why this forum is a good format for me, because I feel happy to respond as I would to support tickets: writing colloquially and without overthinking.

Maybe this forum will bring up enough topics and ideas to indeed make such a tip email a weekly thing!

3 Likes

The colours is really eye catching for me. :heart_eyes: